
How to Make a Phone Tree
About a year ago I had to set up a phone tree for my own business, it was quite a process requiring a great deal of research and sifting through the services of dozens of various companies, now I realize it really should not have been that hard. I thought I would share how I finally went about setting up a phone tree system for my business. In the end (with the right tools) it should only take a few minutes to get a simple phone tree system setup and take your first call. This tutorial will show you how to setup a very simple phone tree (call 704-266-1556 to see it in action ), but you will be able to expand the phone tree to be as robust as you need.
Step 1 - Getting your call tree phone number(s)
In order to set up a phone tree we will leverage a hosted IVR (interactive voice response) system that provides a user interface for developing phone trees. To get started you will need to signup a new IVR Designer account here. After signing up, go to "Phone Numbers" and purchase a new phone number. Ringroost has numbers in USA & Canada and some other countries as well, they have local numbers in every US + Canada state/providence - from Baton Rouge, LA to Portland Oregon. If you don't want to purchase a new number you can just use the default number provided to you. Using the IVR Designer interface is much easier than setting up an IVR in Asterisk which is generally the only other approach to accomplishing this.

Note: Often times businesses will want to set up a phone tree using their current number. The difficulty with keeping your current business phone number is it requires you to port that number to a service provider that has phone tree capabilities. This process usually takes quite some time and is out of the scope of the tutorial. If you use Google Voice, see this guide on how to set up an auto attendant for Google Voice users
Step 2 - Creating your first call flow diagram.
Under your dashboard type in a name for your new flow diagram and click “Add Diagram”. Once created you will see it below, select View/Edit.

Step 3 - Answering the call with an “Inbound Phone Element”
IVR Designer providers a number of elements that are used to control the flow of your call. The first and most important element is the “Inbound Phone Element” which helps you setup an IVR in your PBX. This is the starting point of the call flow diagram and handles all inbound calls for that particular number.
Drag and drop a “Inbound Phone Element” on the board. You will then see a drop down with a list of your phone numbers that are available to be used on this board, select a phone number.
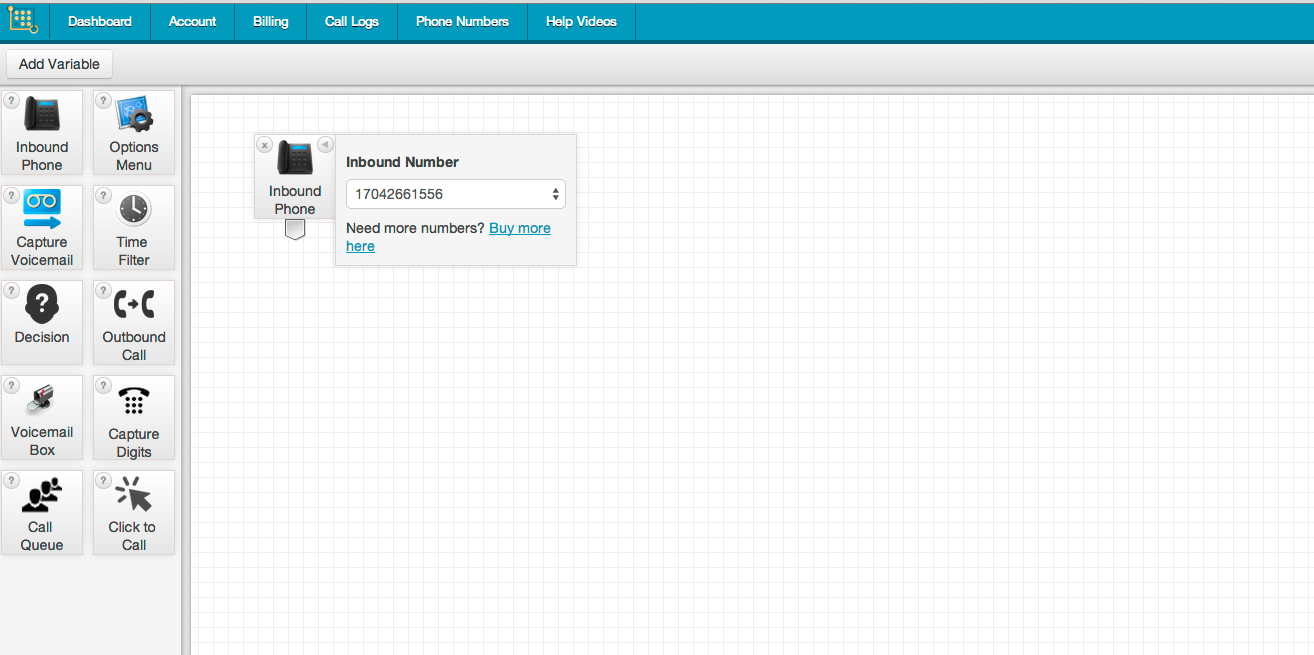
note: If you don’t see any phone numbers in the drop down, it’s because you don’t have any available. Either buy a new phone number or delete a phone number from another call flow diagram. You can only use one number on one diagram.
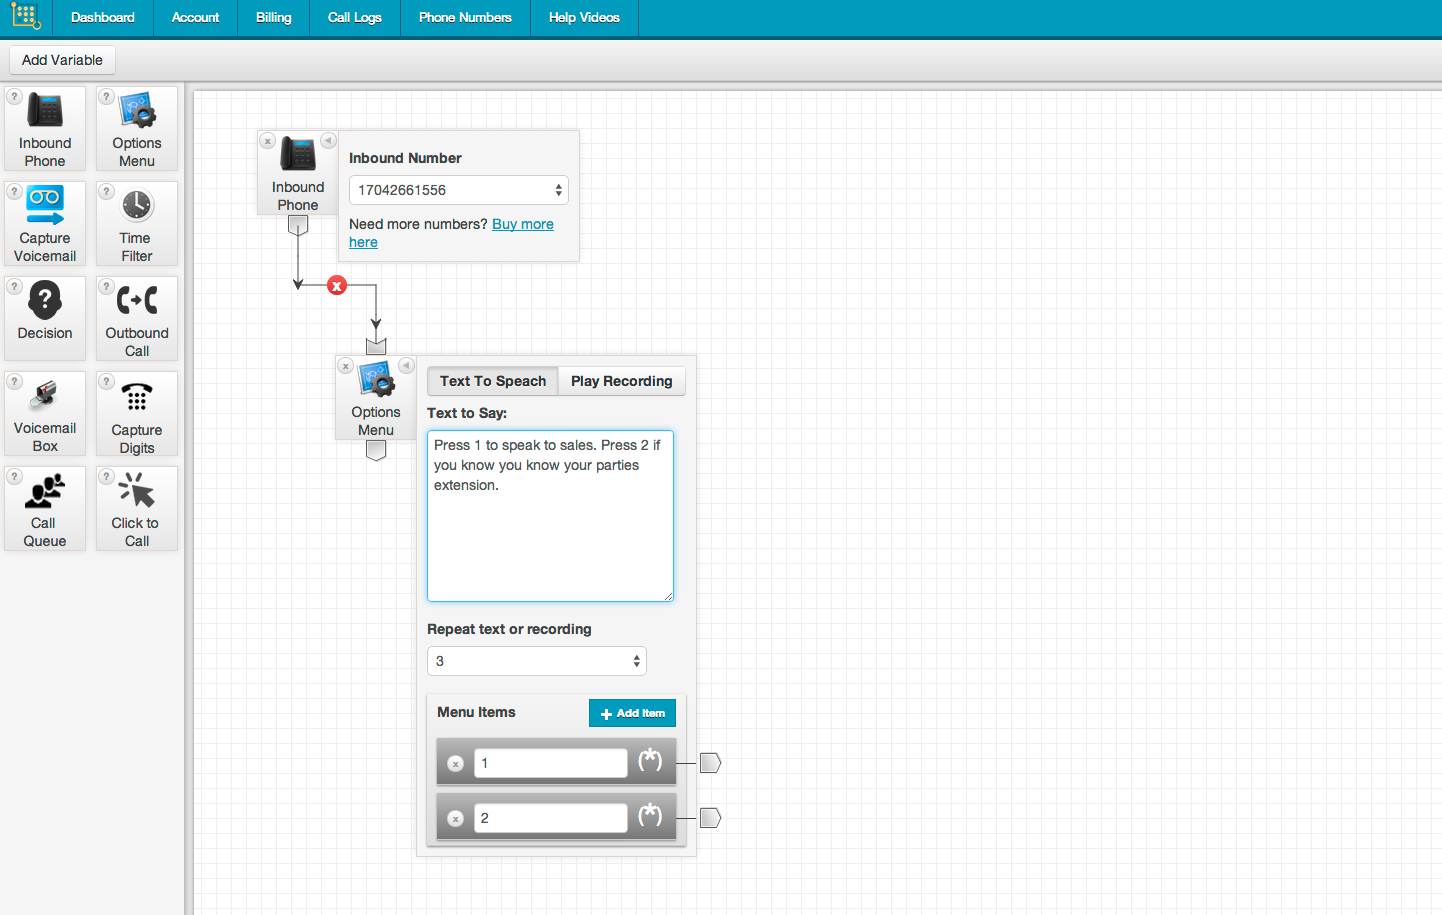
Step 4 - Setting up an Options Menu
Next we will need to setup an “Option Menu” this element is the bread and butter and simply prompts the user to enter a particular number ie: 1 for sales, 2 for technical support, 3 for customer service , etc….
Drag and drop the “Options Menu” element onto the board. Then you will need to connect the “Inbound Phone” element and the “Options Menu” element by dragging the connector from the “Inbound Phone” onto the “Options Menu”.
After connecting the two elements you will need to create a prompt that will be read to the caller. This element offers a few different ways to create a prompt.
- a. You can type the text that will be spoken to the user.
- b. You can record your own voice prompt and upload it in .mp3 format.
- c. You can “Record On Phone” by having it call your phone number and leaving a message.
note: Generally the best quality comes from recording your own voice prompt on your computer and then uploading it in .mp3 format. For simplicity you might want to just type the text at first.
After typing or recording a prompt for the user to hear click “Add Item” next to menu items. You will see a menu item appear. Enter the number 1 into the input field. Click “Add Item” again and enter the number 2.
Step 5 - Connecting the Menu Items
After you have added a couple “Menu Items” you will need to connect them to the next element that you would like to connect the user to. For example if you want everyone who presses 1 to be connected to a sales phone number at 7043436748. Add a “Outbound Call” element to the board, enter that number and connect the elements by dragging and dropping the menu item connector onto the outbound call connector.
You can connect the other menu items to whatever element you want. For example you could connect them to another “Options Menu” which further prompts the user.
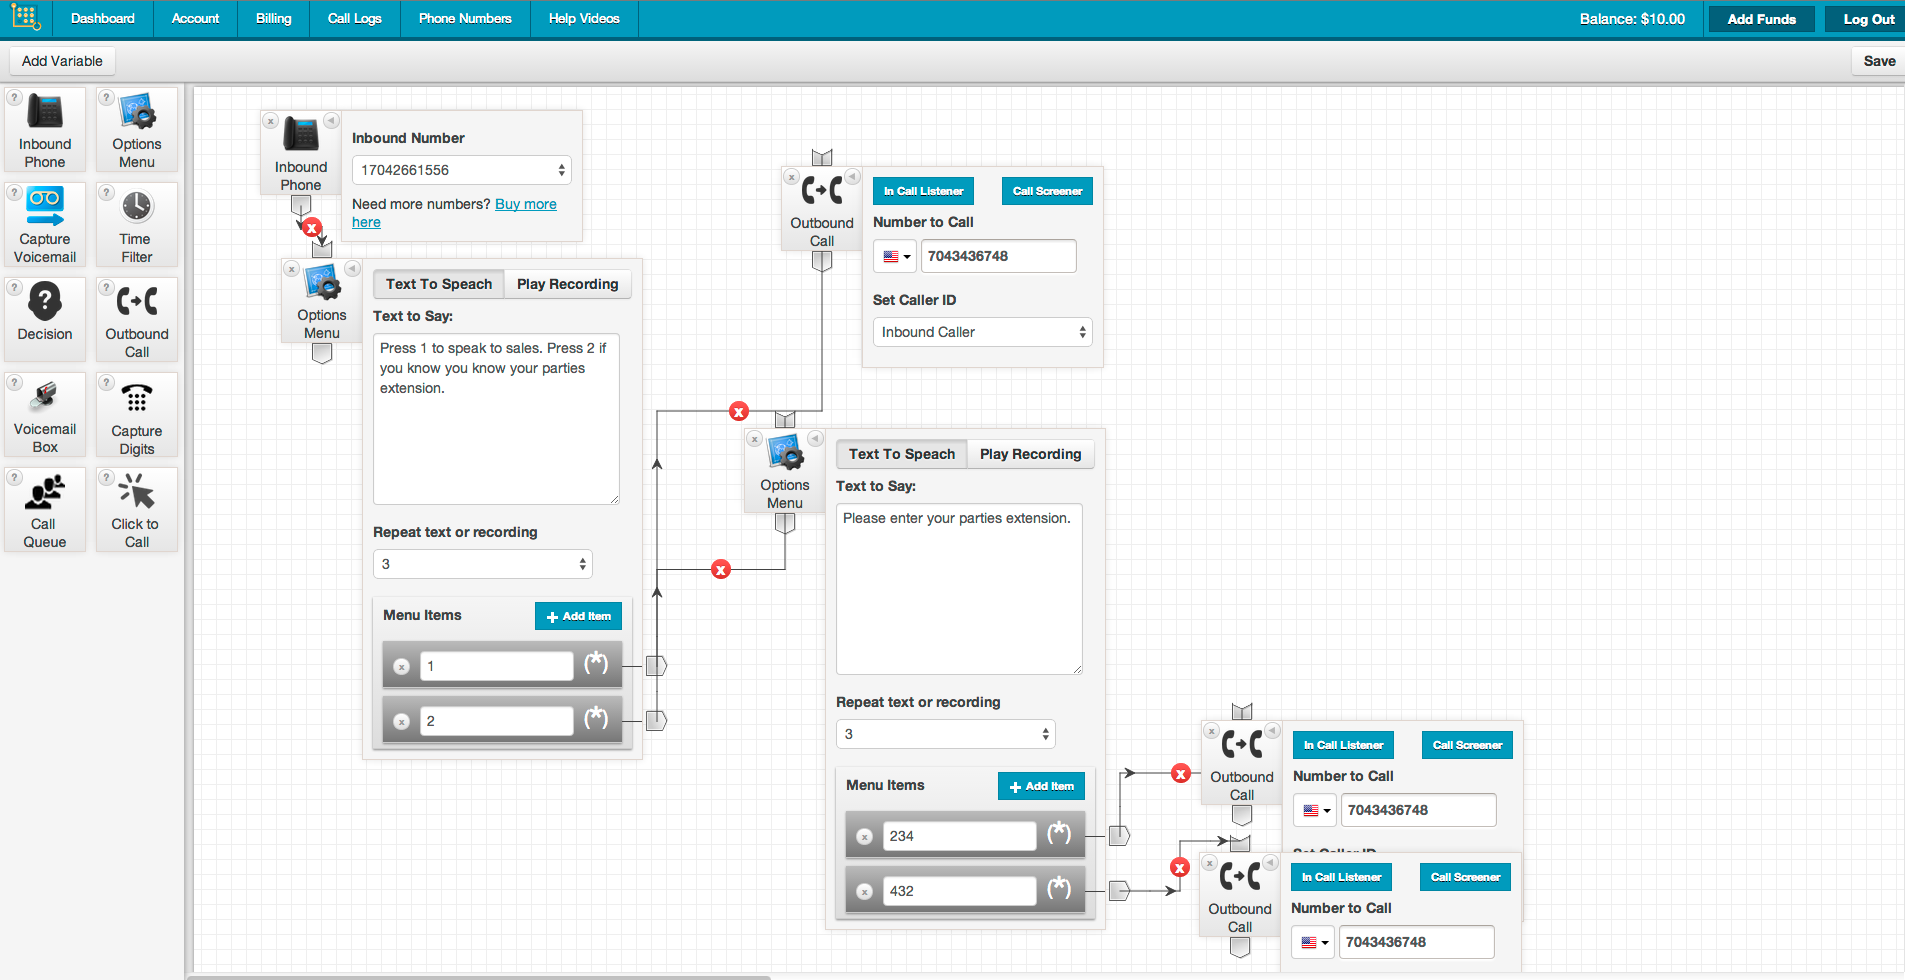
Step 6 - Save and test out your call tree.
Once you're done setting up your call tree be sure to click “save” (top right). Then you can go ahead and give the number a call. You should hear the prompt, and be able to select 1 or 2 and be sent to the appropriate element.
Now that you know the basics of setting up a call tree you can extend your phone system to do much more. There are lots of other controls and features that IVRDesigner.com offers, such as call queues, call filtering, capturing voicemails, capturing custom user input and more. Play around and see what else you can setup!